Getting Started · Updated July 2026
How to photograph the back of your house
The deck preview is only as good as the photo you start with. Good news: it takes one picture and about two minutes. Here is exactly how to get a clean result the first time.
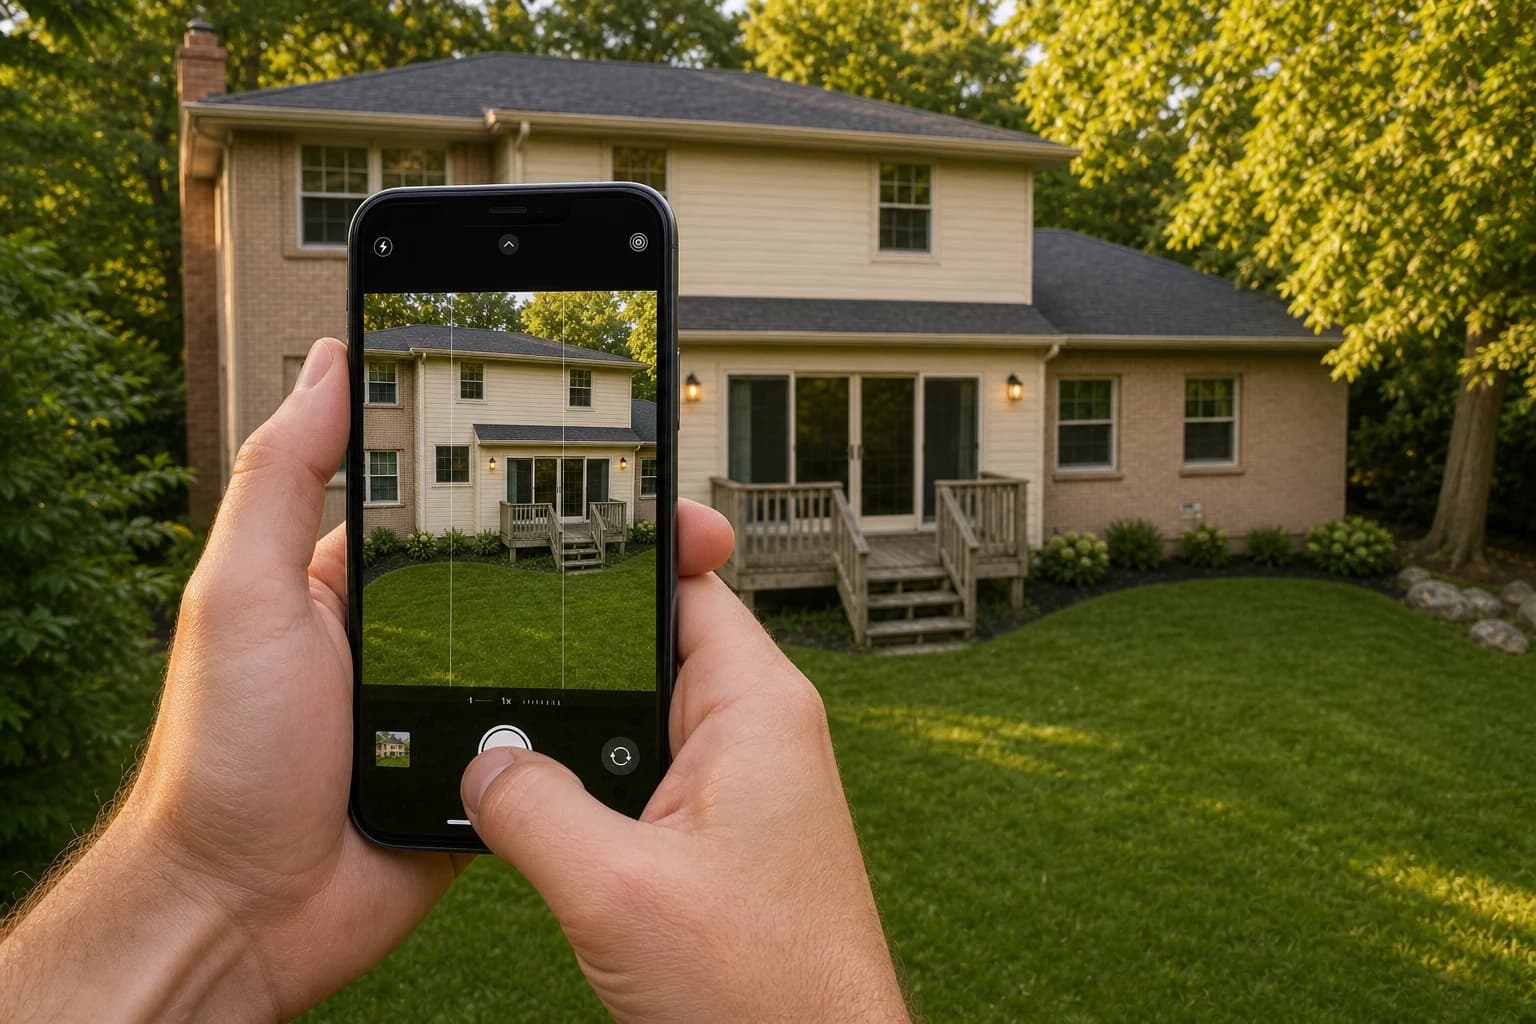
Stand near the center of your yard
Back up far enough that the whole rear wall of your house fits in the frame, with a little room to spare. Straight-on beats an angle—stand square to the wall, not off to one side.
Frame the full back wall and the ground
Include the doors, the windows, and—importantly—the ground below them, where a deck would actually sit. If the base of the wall is cut off, the preview has nothing to build on.
Shoot in flat daylight
Overcast light or open shade is ideal. Avoid harsh backlight (don't shoot into the sun), deep shadows, and dusk. You want the walls, doors, and ground clearly visible.
Keep it clean and level
Hold the phone level, not tilted up or down. Move trash cans, cars, and clutter if you can, and skip photos with people in them. A clear, unobstructed wall gives the best result.
A quick checklist
- Full rear wall in frame, with the ground below it visible
- Straight-on and level—not tilted or off to the side
- Flat daylight, no harsh backlight or deep shadow
- No people in the shot; clutter moved out of the way
Nail those four and your preview will place a deck cleanly against your house. If the tool asks you to retake the photo, it just means one of these was off—usually lighting or angle—so step back, square up, and try again.